What we know as the classic push-up movement has a very long, involved history. The basic concept of pushing up from the floor with your arms from a face-down position harkens back thousands of years in the form of the Indian “dand” and Persian “zurkhaneh” movements, and very likely for thousands of years before that.
The Roman army formally used push-up movements in their strength-building regimens, and the Roman emperor Constantine was historically noted for performing push-ups during his reign from 307 to 337 A.D. for health, which is perhaps why he was known as Constantine the Great.
As with lunge, squat, and jumping movements, the push-up is a very natural way of engaging our bodies with the environment, and one of the very first we encounter in our human development cycle. In fact, it’s very common for us to develop the ability to push up on our forearms between two and four months of age, and many of us master the ability to push up into full elbow extension at approximately four to six months. This generally predates our ability to sit up independently.
The Indian wrestler Jerick Revilla is credited with inventing the modern-day push-up and lending it that name, while Eugene Sandow—who is credited with coining the term “bodybuilder” and was perhaps the world’s first mixed-media fitness influencer—helped popularize it.
During a push-up, you assume the same basic posture you had as a baby: face down on the ground with your palms flat on the floor. The real magic emerges when you push your body up from the floor. One of the most amazing things about the push-up is that it’s almost impossible to perform it without engaging your core.
You simply cannot perform many exercises without proper core engagement, and I often include specific instructions to ensure it. During a push-up, however, the very act of maintaining a straight trunk draws deeply on your core musculature, providing a built-in benefit. You’ll use your core whether you think about it or not.
4 Push-Up Variations to Power Up Your Body
Once the efficacy of the modern push-up was revealed, militaries around the world adopted the movement as part of their basic training physical fitness regimens, and I recommend it for your fitness regimen as well. The following four push-up variations can help build strength and maintain your fitness.
I suggest speaking with your medical provider first to ensure that these exercises are appropriate for you.
1. Wall Push-Up
The wall push-up lightly engages your chest and shoulder muscles, as well as your core, particularly the anterior chain of muscles along the front of your trunk. The key word here is “lightly.” Due to your relative position in space during this exercise, you will be bearing approximately 30 percent to 40 percent of your body’s total weight. That’s nothing to sneeze at, and yet a small enough amount of weight to allow the exercise to be accessible.
In this exercise, your legs are still generally in a vertical weight-bearing position, where a considerable amount of weight is distributed through the large bones of the legs, so it’s more like standing with a twist than the other movements we’ll try later here.
Step 1: Stand with your palms on the wall, your arms straight out with your elbows locked—adjust how far you stand from the wall to allow this. Keeping your hands in place, slowly step back from the wall until you’re placing a palpable amount of weight on your hands. Be sure to keep your arms in position.
Step 2: Keeping your back straight and your neck upright, slowly bend your elbows and lean your upper body toward the wall until your nose is almost touching it, then push back to the starting position.
Step 3: Moving toward the wall, then pushing back, counts as one repetition. Try to perform three sets of 15 repetitions.
Modifications: If you can’t lower all the way to the wall, just move as far as you can before pushing back up. Feel free to modify the sets and repetitions to best suit your needs. To make it even easier, don’t step back into a lean—instead, perform the movement from upright standing. In this instance, move very slowly, taking about five seconds to move into and out of the push-up.
Why I Like It: The wall push-up provides a light-duty workout that targets the same muscles as the regular push-up, without the heavy investment in strength. It’s a great place to start for those of you who suffer from pain.
2. Incline Push-Up
Let’s take it up a notch by moving from upright standing to the incline push-up, also known as the “box” push-up. Instead of pushing off a wall while standing, you push up off of a couch, chair, or other surface at a considerably increased angle to the floor relative to the wall push-up, but less than the other movements we’ll perform later. This exercise requires you to bear between 40 percent and 55 percent of your total body weight on your arms, depending on the height of the exercise; using furniture will keep the weight-bearing on the lower end.
Step 1: Start with your palms on a stable couch, chair, or bench—even a sturdy box can work—with your hands slightly wider than your shoulders to allow your upper arms to move without coming into contact with your body as you move downward. Extend your legs out until you’re bearing weight on your toes and hands.
Step 2: Keeping your body in a straight line from your shoulders to your ankles, bend your elbows and lower down until either your chest touches the raised surface or you’ve gone as far as you comfortably can, then slowly push back up to the starting position.
Step 3: Moving down, then pushing back up counts as one repetition. Try to perform three sets of 15 repetitions.
Modifications: You can perform this exercise with your knees down if needed, but be sure to keep your trunk straight and your body at roughly a 45-degree angle relative to the floor to ensure the exercise remains effective. Modify the sets and repetitions to best suit your needs. Pad your knees if needed, especially if you feel discomfort.
Why I Like It: The incline push-up places significantly greater demands on your core musculature because it moves your spine out of upright weight-bearing, which means it works your core wonderfully. However, it is only an incremental increase from the wall push-up, making it an excellent transition exercise.
3. Classic Push-Up
Now we’re getting serious. The classic push-up can place up to 70 percent of your entire body weight on your arms and shoulders. It also places strong demands on your core musculature, because your spine is completely out of a weight-bearing position at this stage, and you have to rely on your core musculature to maintain trunk positioning.
Step 1: Start on the floor with your arms straight up and down, and your hands slightly wider than your shoulders so your upper arms can move without coming into contact with your body as you move downward. Extend your legs out until your knees are locked straight and you’re bearing weight on just your toes and hands.
Step 2: Keeping your body in a straight line from your shoulders to your ankles, bend your elbows and lower until your chest touches the floor or as far as you can comfortably go, then move back up into the starting position.
Step 3: Moving down to the floor and then pushing back up counts as one repetition. Try to perform three sets of 15 repetitions.
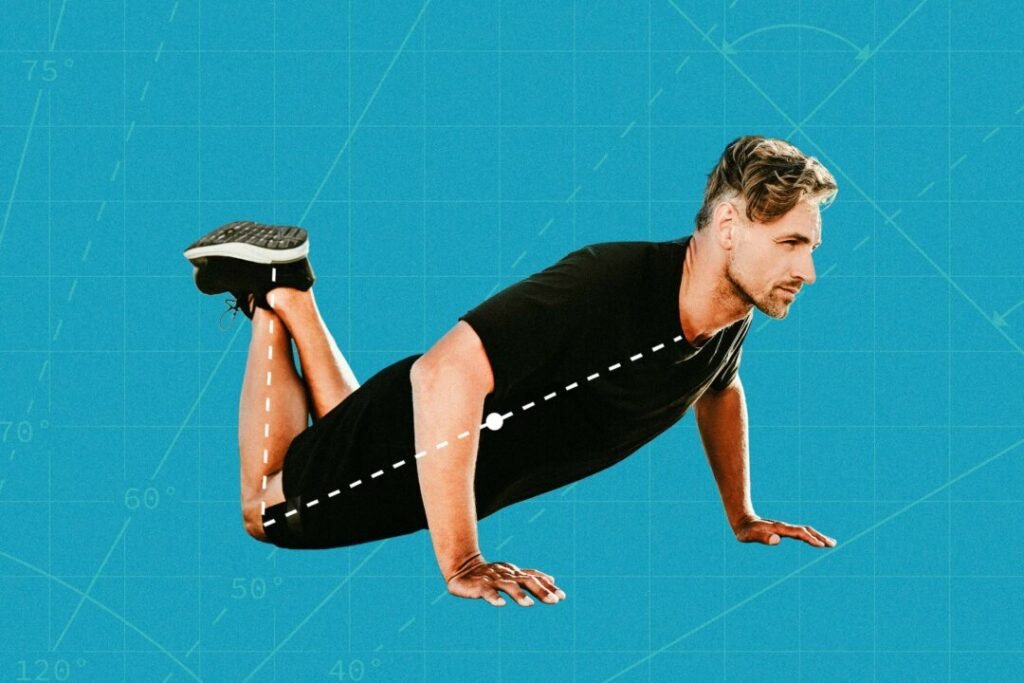
Modifications: If you can’t perform this exercise on your hands and feet, feel free to lower your knees to the ground to make it simpler. Known as a “three-quarter” push-up, this position is still quite effective. Also, feel free to abbreviate how far you lower into the push-up if you struggle to rise back up from all the way down, or if doing so causes too much discomfort. This is an absolutely challenging exercise, so feel free to adjust how many sets and repetitions you perform at first.
Why I Like It: The classic push-up can be considered a “moving plank,” wherein you add arm movement and postural elevation changes to the classic tall plank position, making it quite challenging overall but supremely good for powering up your body. It’s a compound movement that makes your core a powerhouse.
4. Diamond Push-Up
The diamond push-up is performed from the same basic position as the classic push-up, but with your hands close together. This places greater emphasis on your triceps—the real focus here—and increases your core’s role in stabilizing the movement because you have a narrower base of support. The chest and shoulder muscles, however, are not robbed by this exercise and get a great workout themselves, because you’re still bearing about 70 percent of your total body weight on your arms.
Step 1: Start on the floor, with your elbows straight and your thumbs and forefingers touching so that they form a “diamond” shape. Place your feet approximately hip-width apart and straighten your knees until you’re bearing weight on your toes and hands.
Step 2: Keeping your body in a straight line from your shoulders to your ankles, bend your elbows and lower until either your chest touches the floor or you can go as far as you comfortably can while keeping your trunk in a straight line, then push back up into the starting position.
Step 3: Moving down to the floor and then pushing back up counts as one repetition. Try to perform three sets of 15 repetitions.
Modifications: I generally find that the diamond push-up is more challenging for most people and suggest that you master the other push-up movements before advancing to this one. If you can’t go all the way down and then back up, just do what you can. You can also perform the diamond push-up off the same elevated surfaces you use for the incline push-up.
Want to make it harder? Of course you do! Place your feet side by side to narrow your base of support and put your core muscles in high gear.
Why I Like It: Among the various types of push-ups, the chest muscles get the most benefit with this one. The diamond push-up ensures the triceps get their fair share.
These exercises are very capable of making you stronger from your shoulders to your feet, and they’ll give you magnificent core strength. I suggest performing them three times per week to allow your muscles to properly rest between workouts, but feel free to adjust your sets, repetitions, and the number of days per week you perform them. I hope these exercises serve you well, and I wish you good luck.
About the Fitness Model: Aerowenn Hunter is a health editor for The Epoch Times. She’s an accredited yoga therapist with more than three decades of teaching experience.