
Blog Post: How to Create a Free Blogger Website in 2024 (The Ultimate Guide)
In a digital age where everyone has something to say, starting a blog is the most powerful way to share your voice, build a community, or even launch a business. But for beginners, the perceived cost and technical complexity of building a website can be a major roadblock.
The good news? You can create a stunning, fully functional, and completely free Blogger website in under 30 minutes.
Blogger, Google’s own blogging platform, has been the silent workhorse behind millions of successful blogs for over two decades. It’s free, reliable, and incredibly easy to use, yet powerful enough to grow with you. Whether you want to share your travel diaries, offer expert cooking advice, or build a portfolio, Blogger provides the perfect, no-risk starting point.
In this comprehensive guide, I’ll walk you through every single step of creating your own free Blogger website. From signing up for your account to writing your first post and even making money, you’ll have all the knowledge you need to join the millions of voices already sharing their passions online. Let’s turn your idea into a reality.
Why Choose Blogger? The Power of Free
Before we dive into the “how,” it’s important to understand the “why.” Why choose Blogger over other platforms like WordPress or Wix?
The official Blogger website puts it simply: it allows you to “share your passions in your own way.” But the benefits go much deeper:
-
It’s 100% Free, Forever: There are no hidden costs, no premium tiers to unlock basic features, and no time limits. You get free hosting on Google’s ultra-reliable servers, meaning you never have to worry about your site crashing if you get a sudden spike in traffic. For a beginner, this removes all financial risk.
-
A Free Domain Name: When you create a free Blogger website, you immediately get a subdomain like
yourblogname.blogspot.com. It’s a professional, clean address that’s instantly recognizable. And if you later want to upgrade, you can easily connect a custom domain (likewww.yourblogname.com) for a small annual fee. -
Seamless Integration with Google: Because Blogger is a Google product, it integrates seamlessly with other tools you already use. You log in with your Google Account. You can use Picasa/Google Photos for images and, most importantly, it works hand-in-glove with Google AdSense for monetization and Google Analytics for tracking your audience.
-
Simple, Yet Powerful: Unlike complex content management systems that have a steep learning curve, Blogger is designed for simplicity. Its interface is clean and intuitive. You can focus on writing great content instead of wrestling with plugins and server configurations.
-
Security and Reliability: Your blog is hosted by Google. This means it benefits from Google’s world-class security infrastructure, automatic updates, and guaranteed uptime. You don’t need to worry about hackers or backing up your site manually.
![]()
Step 1: Setting Up Your Google Account and Blogger Profile
Your journey to create a free Blogger website begins with a Google Account. If you use Gmail, YouTube, or Google Drive, you already have one.
-
Go to Blogger.com: Navigate to the official Blogger.com website. You’ll be greeted with a clean homepage that echoes the benefits we just discussed.
-
Sign In: Click the prominent “Create Your Blog” or “Sign In” button. You’ll be redirected to the Google login page.
-
Use Your Google Account: Enter your Gmail address and password. If you don’t have a Google Account, click “Create account” and follow the simple steps to set one up. It takes just a minute or two.
Once you’re signed in, you’ll be taken to the Blogger dashboard. This is your command center. If this is your first time using Blogger, you might see a message welcoming you and a button to “Create Your Blog” . Click it to begin the setup.
Step 2: Naming Your Blog and Claiming Your Free Domain
This is where your blog starts to take shape. You’ll be asked for two key pieces of information:
-
Title: This is the name of your blog. It can be creative, descriptive, or your own name. For example, “The Adventures of Greenback,” “Tech for Grandmas,” or “Sarah’s Baking Diary.” Don’t stress too much; you can change this later.
-
Address: This is your free domain (URL). Think carefully about this one. It will be
the name you choose .blogspot.com. It’s best to make it closely related to your blog’s title or topic. For example, if your blog is about healthy recipes, you might tryhealthyrecipeswithsarah.blogspot.com.-
Check Availability: Type your desired address into the box. Blogger will instantly check if it’s available.
-
Get Creative: If your first choice is taken, try adding a keyword, a location, or your name. Avoid using hyphens or numbers as they can be hard for people to remember.
-
Once you’ve found an available address you love, click “Save” . Congratulations! Your blank blog now exists at that address on the web.
Step 3: Choosing a Design That Reflects Your Style
You wouldn’t judge a book by its cover, but people absolutely judge a blog by its design. A clean, attractive layout keeps readers on your page and makes your content look professional. Blogger makes this step incredibly easy.
-
Navigate to Theme: On your Blogger dashboard, look at the left-hand menu and click on “Theme” .
-
Browse the Options: You’ll see a selection of free, mobile-responsive templates. These aren’t the boring templates of the early 2000s. They are modern, clean, and fully adaptable to phones and tablets. Hover over a template to see a live preview.
-
Choose Your Favorite: Click on a template you like. For a first blog, it’s often best to choose a simple, clean design with a focus on readability, like “Contempo” or “Soho.”
-
Customize It: This is where the magic happens. Click the “Customize” button next to your chosen theme. This opens a powerful, visual drag-and-drop editor.
-
Background: Change the background color or upload your own image.
-
Layout: Adjust where your sidebar is, how many columns your posts have, and the position of your header.
-
Advanced: Tweak fonts, link colors, and the width of your blog. You can see every change in real-time, so feel free to experiment!
-
Don’t aim for perfection right now. The most important thing is to start with a clean, uncluttered design. You can always tweak it later as your style evolves.
Step 4: Writing and Publishing Your First Blog Post
Your blog is set up and looks great. Now for the main event: content. Let’s create your very first post.
-
Go to Posts: On the left-hand menu, click the down arrow next to “Posts” and select “New post” . Alternatively, you can click the “New post” icon (a pencil and paper) at the top of the dashboard.
-
Craft Your Content: You are now in the post editor. It’s very similar to a word processor like Microsoft Word or Google Docs.
-
Title: Give your post a compelling title. For your first post, you could introduce yourself and what your blog will be about (e.g., “Welcome to My Blog! Let’s Get Started”).
-
Body: This is your canvas. Write your content. Use the toolbar to format your text—add headings (H2, H3) for structure, create bold text, and make bulleted lists. This not only makes it readable but also helps with SEO.
-
Add Images: Click the image icon to upload photos from your computer, Google Drive, or directly from a camera. Images break up text and make your post more engaging.
-
-
Add Labels (Tags): On the right-hand side, you’ll see a section called “Labels.” These are like categories or tags for your posts. Type in keywords related to your post, separated by commas (e.g.,
welcome, introduction, blogging tips). This helps readers find related content on your blog. -
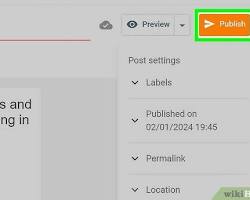
Preview and Publish:
-
Click “Preview” to see exactly how your post will look on your blog. Check for typos and formatting errors.
-
Happy with it? Click the orange “Publish” button. Your post is now live for the world to see!
-
Step 5: Essential Settings to Launch Your Blog
Before you start promoting your blog, there are a few crucial settings to configure. Go to “Settings” in the left-hand menu.
-
Basic:
-
Title: You can change your blog’s title here if you had second thoughts.
-
Description: This is a short tagline that describes your blog (e.g., “A blog about sustainable living in the city”). This often appears in search engine results, so make it clear and compelling.
-
Privacy: Make sure “Add your blog to our listings?” and “Let search engines find your blog?” are both set to “Yes” . This tells Google and other search engines to index your site.
-
-
Email:
-
Post using email: This is a fantastic feature. You can set up a secret email address. By sending an email to this address (with the post title in the subject line and the content in the body), Blogger will automatically publish it. It’s perfect for quick updates from your phone.
-
-
Permissions:
-
Blog Authors: If you ever want to invite a friend to write for your blog, you can add their email address here.
-
Take five minutes to review these settings. They form the foundation of your blog’s visibility and functionality.
How to Make Money from Your Free Blogger Website
For many, the dream isn’t just to share a passion but to turn it into a source of income. The official Blogger website highlights this directly: “Turn your passion into income.”
The primary and most seamless way to monetize a Blogger blog is through Google AdSense.
-
The Connection: Because AdSense is also a Google product, it integrates directly with Blogger. You don’t need to copy and paste complex code.
-
How to Apply:
-
On your Blogger dashboard, go to the “Earnings” tab on the left menu.
-
Click the button to “Sign up for AdSense” .
-
You’ll be guided through the application process. You need to provide your website (your blog’s URL), your contact information, and your tax details.
-
Google will review your blog to ensure it meets their program policies. This usually takes a few days to a couple of weeks.
-
-
How It Works: Once approved, AdSense will automatically display relevant text, display, and in-feed ads on your blog. When your visitors click on these ads, you earn a portion of the advertising revenue.
Pro-Tip for Monetization: Don’t apply for AdSense the second you create your blog. Focus first on creating at least 10-20 high-quality, original posts. Write about topics people are searching for. Build a small audience. A blog with substantial, valuable content is much more likely to be approved by AdSense. For more in-depth strategies, you can explore resources like this guide on blog monetization strategies from a leading marketing site or learn about building an email list to complement your ad income .
Understanding Your Audience with Blogger’s Built-in Analytics
Creating a blog is one thing; creating a blog that people actually read is another. To do the latter, you must understand your audience.
Blogger provides a simple, built-in stats tool to get you started. You can find it by clicking “Stats” on the left-hand menu. It shows you:
-
Pageviews today, yesterday, and all-time: A quick snapshot of your traffic.
-
Popular posts: Which content is resonating most with your readers?
-
Traffic sources: Are people finding you through Google search, social media, or other websites?
-
Audience: What countries are your readers from? What browsers are they using?
This information is gold. If you see that a post about “vegan lasagna” is getting ten times more views than your other posts, it’s a clear signal to write more vegan recipes.
For more advanced insights, you can link your blog to Google Analytics. It’s a free, world-class tool that provides infinitely more data. In your Blogger Settings, find the “Google Analytics” section and paste in your tracking ID.
Advanced Tips to Grow Your Free Blog
Your free Blogger website is just the beginning. Here are some expert tips to take it to the next level:
-
SEO for Bloggers: Search Engine Optimization is how people find you on Google.
-
Use your target keyword in your post title, in at least one subheading (H2, H3), and naturally throughout the content.
-
Write a compelling meta description for each post (you can set this in the post editor settings on the right-hand side). This is the short blurb that appears under your title in search results.
-
Use alt text for all your images. Describe the image using your keywords. This helps Google understand your images and can drive traffic through Google Image Search.
-
-
Custom Domain: Once your blog grows, consider purchasing a custom domain (like
www.yourname.com). It looks more professional and is easier for people to remember. You can buy one directly through your Blogger Settings under “Custom Domain.” -
Promote on Social Media: Don’t just publish and pray. Share every new post on your social media channels like Pinterest, Instagram, Facebook, and Twitter. Join relevant online communities and share your expertise (with a link back to your blog) when appropriate.
Troubleshooting Common Beginner Questions
-
“My blog looks weird on my phone!” : Don’t panic. Go to your Theme settings and click the mobile icon (looks like a phone) to preview. Most modern Blogger themes are automatically mobile-responsive. If not, in the Theme settings, you can set “Mobile” to “Yes. Show mobile template on mobile devices.” This forces a clean, simple mobile view.
-
“I forgot my password!” : Since you log in with your Google Account, simply go to the Google Account recovery page.
-
“Can I move my blog to WordPress later?” : Absolutely. Blogger allows you to easily export all of your content (posts, comments, and pages) as an XML file. You can then import this file into a self-hosted WordPress site if you ever decide to make the leap.
Conclusion: Your Voice Matters—Start Today
Creating a free Blogger website is the easiest, smartest, and most risk-free way to begin your blogging journey. You don’t need to be a tech wizard, and you don’t need a big budget. You just need an idea and the desire to share it.
With Google’s reliable infrastructure, beautiful free templates, and a clear path to monetization, Blogger removes all the barriers between you and your audience. The platform you just learned about has powered millions of blogs, and it’s ready to power yours too.
Your first step is simple. Go to Blogger.com , sign in with your Google account, and create your blog. Don’t overthink it. Choose a name, pick a design, and write your first post introducing yourself to the world.
The internet is waiting for your unique perspective. Don’t keep it waiting any longer. Create your free blog today and let your voice be heard.